Apart from a few Dark Age Hibernian des res roundhouses, the forthcoming "Wyrley Retinue" demo game for 2017 required something a bit more substantial - a Rath, or Irish ring fort.
I first encountered one of these in an article on building one in "Wargames World" magazine, issue 5, about 30 years ago. That was also when I made a mental note to forego Ellendun, Ashdown and Maldon if I ever got into Dark Ages wargaming and head west instead to the Emerald Isle. An even better model than my original inspiration turned up in the "Shieldwall" (glimpses) and "Age of Arthur" (full on PHWOAR!!!) supplements for Warhammer Ancient Battles. So, with our theme decided earlier this year, we were heading off to Ireland in the 9th Century (-ish) and we were having a Rath.
Step 1 - take a piece of 3mm MDF and add concentric rings of polystyrene to achieve the desired height. Four rings in my case. Leave space for a gateway to access your primitive fortification.
Step 2 - take lengths of bamboo skewer, twig, cocktail stick, thin dowel and similar wooden materials and glue them into your ring of polystyrene using PVA glue or similar stuff that won't melt your rings of gleaming whiteness! A palisade may be a bit of artistic licence in this era, but I like it. The Ancient British stopped using palisades in their hillforts before the Romans arrived according to archaeology.
Step 3 - use wood filler to cover all the polystyrene.
Step 4 - build your gatehouse.
Step 5 - paint everything to taste.
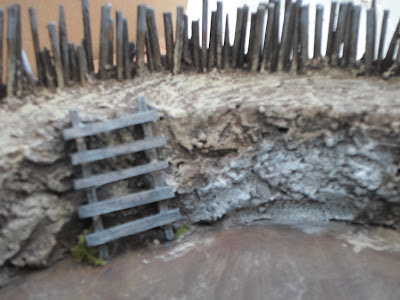
Step 6 - remember to either build in some steps up to the ramparts and gatehouse platform for your figures to access them. Alternatively, build ladders afterwards like I did!
Step 7 - add scenic materials to blend it into your normal terrain boards/ cloth/ whatever.
Step 8 - remember to take it to the "Wargamer" show on 4th December for its first outing!!!
 |
| I have painted the whole thing largely to represent earth banks, but patches of rock are also visible for some variety in the finished article. |
 |
| Access ladders were made from matchsticks with artists' card runners glued on. |
I will glue in the most fancy of the three roundhouses and cover off some basic scenic work in the largely inaccessible bit behind the roundhouse and then hand the whole thing over to Nephew Nick to blend in to the boards he is making for the game, covering off Step 7. Finally, as in Step 8, I trust he will actually turn up at Wargamer with it!
G.


Excellent terrain piece, looking forward to seeing it at a show sometime in the new year.
ReplyDeleteCheers Matt. The plan is to be at WMMS in March, so hopefully see you there.
DeleteG
That is brilliant!
ReplyDeleteThanks Gordon! I will be posting some photos of it finished and in action very soon!
Delete