Hello again.
Even with a south-facing conservatory for a mancave, there are times, especially at this period of the year, when it is just too gloomy to see anything properly to be able to paint. Natural light is my preference, but there is not much around at the moment! So, I went on a recce for Christmas presents for the brood with my wife last weekend and we ended up in a place called "The Range", a sort of Hobbycraft and similar outlet if you do not know it. We were not looking for anything for me, but needless to say, I found a few things!
For the princely sum of £4, I bought these two Christmas decoration kits, which, as you can see stand around four to five inches high when built. I think you are supposed to build them, paint them, and then either hang them on your Christmas tree or put a tea light in them. BUT WE DON'T WANT TO DO THAT, DO WE!?!?!?
 |
| I did at least build one, but those awful tags had to come off... |
 |
| ...so off they came! |
At this point, you will obviously have gathered my reasoning. For that paltry £4 outlay, I wanted to investigate whether I could add to my terrain pool something unique after finishing my initial purchase of Sarissa Precision kits for "Burrows & Badgers" that I got from the Chillcon show last month.
So, with stage one complete, what now? Well, I could have drawn a plan of what I wanted to do, but that would be too technical! So I winged it.
 |
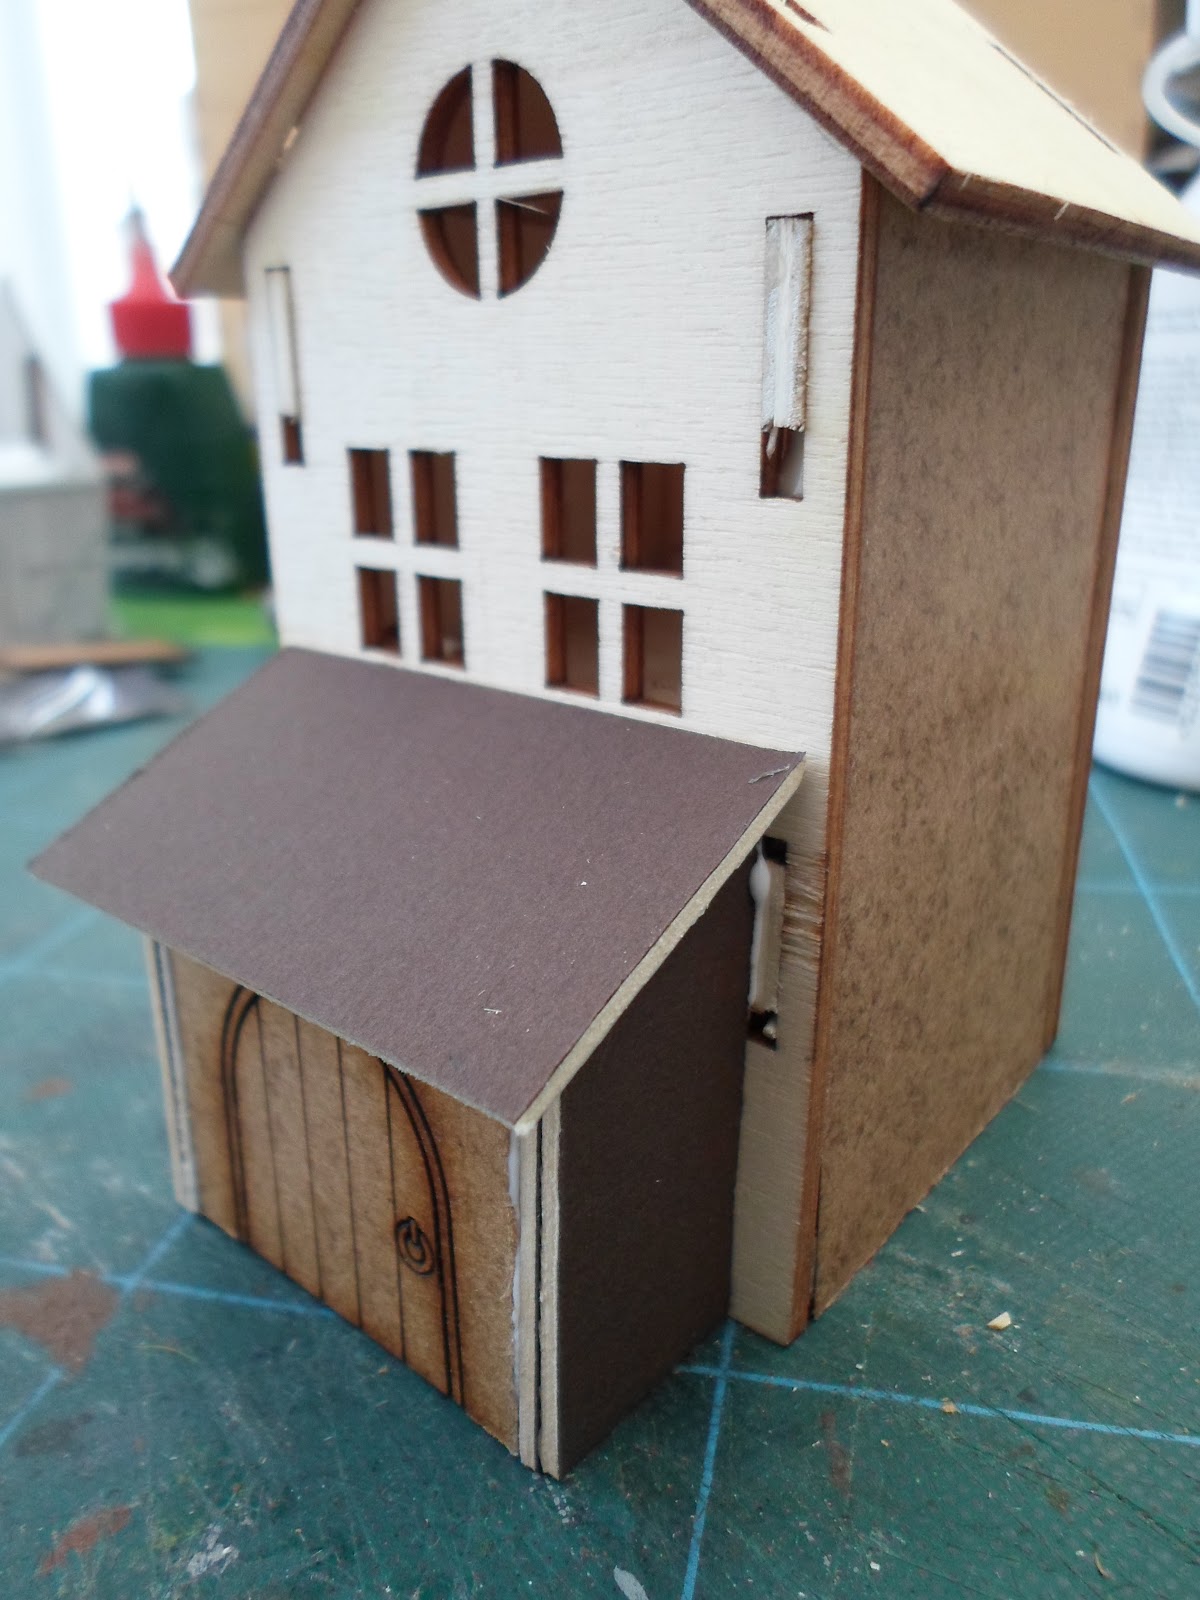
| Stage Two saw the building of an entrance lobby, a simple lean-to affair and I added one of the doors from the Doors Pack from Sarissa that I bought at Chillcon. We will overlook the fact that I had already added a floor at roof level to give added structure to the piece BEFORE I thought to glaze the upper windows...D'oh! |
 |
| Stage Three saw me build up the living space. I decided on a sort of wrap around lower storey, knowing full well that the subsequent roof angles could be a total pain... |
 |
| The end wall features another of the Sarissa Precision doors. I will add a shuttered window on that side too in the near future. |
 |
| Stage Four saw the need to roof the lower storey. With some careful measuring from which I cut out paper templates, I was able to fit a pretty decent roof. |
 |
| Et voila! |
 |
| Stage Five saw me needing a chimney stack, which I fabricated from a scrap of 3mm MDF. The same material was used, along with some 2mm mounting card, to build the actual stack above roof level, topped off with some plastic tubes pots. |
 |
So that is the basic build.
|
It has taken me around four man hours to get this far, which is probably longer than the equivalent kit would have taken, but you obviously have to fabricate parts yourself without a kit. However, a self-built thing is unique.
I still have to tile the rooves and finish the body of the building with timber framing, rendering, brickwork, window sills and whatever, but the structure is built and sound in that it is not going to fall over any time soon. I will also base it for added stability and the idea of a vegetable garden is one I think I will pursue for this dwelling. I will finish this one as and when work, light and time allow. Then there is the little matter of the second building and what to do with that one...
G


No comments:
Post a Comment