Fort Nummanmason (don't bother looking for it on a map or researching it in a history book...) started to take shape in my previous post, ready to form part of the forthcoming "Wyrley Retinue" demo game at the Barrage Show in Stafford on 8th July at Blessed William Howard Catholic High School. If you recall, we left the building of that edifice, and the posts describing the construction, at the stage where the basic pieces were built but lacked detailing and painting.
So, what did I do next?
1) Add your details before you start to texture the relevant surfaces. The gabions are from Renedra, who market a lot of plastic bits and pieces for wargamers from bases to fences and also make stuff for others, such as the Perry's. I also added bits of twig and other detritus to show the sort of attempts the defenders would have made to shore up their cannon=battered defences.
2) The two photos above also show the beginning of the paintwork required above and beyond the fences. The battening for the walkways was painted a medium brown (GW Steel Legion Drab), then drybrushed in various greys and knocked back with the odd brown wash until I got the wethered wood look I was after.
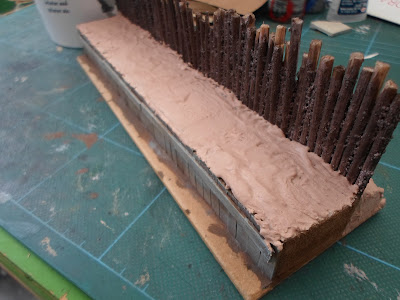
3) Once these bits are done, it is time to texture all the relevant earth bits, using wood filler. I used a cheap, brown version for this, but any type is suitable, as you will be painting it extensively once it has dried. Make sure you get into all the various nooks and crannies! I used textured paint ("Basetex" or similar) to fill the tops of the gabions as its finer texture made it more controllable in such small areas. Once painted, it all ties in.
4) I have missed out a few stages of paintwork to get to the above pictures! Starting with a chocolate brown (Wilko's "Java Bean" in this case, but any dark, chocolate brown colour will do), I painted all the earth areas on the pieces. They were then heavily drybrushed with an earthy colour (Humbrol Dark Earth), then again with a sand/ light earth colour (Wilko's Safari Sand) and finally with a pale, creamy colour (Wilko's masonry paint, colour unknown because the label has fallen off!). Once this is complete, you have a dried earth base on which to add grass and other textures as desired.
5) I cheated a little and used "Basetex" for the grassy areas, but flock or painted grit/ sand/ ballast would do. Once the "Basetex" was dry, I drybrushed it first with Wilko "Warm Yellow" and finally with Wilko "Yellow Submarine". I still have the option of adding bits of foliage and other material to enhance the pieces, but they are basically finished and ready as they stand.
And here they are arranged as they will appear on the tabletop for the aforementioned demo game, together with a little, burnt out storage hut I have built to show the extent of the British position as they defend the fort under heavy bombardment whilst awaiting relief, which is the basis for the whole game, "The Relief of Fort Nummanmason".
Apart from perhaps adding some extra foliage detail, I think I will certainly tone down the glacis on the fort to blend it in better with my terrain boards!
I am pretty happy with the pieces, but there are a couple of things I would do differently with hindsight.
- Tone down that light green on the glacis.
- Make the corner as one piece to avoid the gap which is still visible.
G


Useful and beautiful, a creative and very nice job!
ReplyDelete